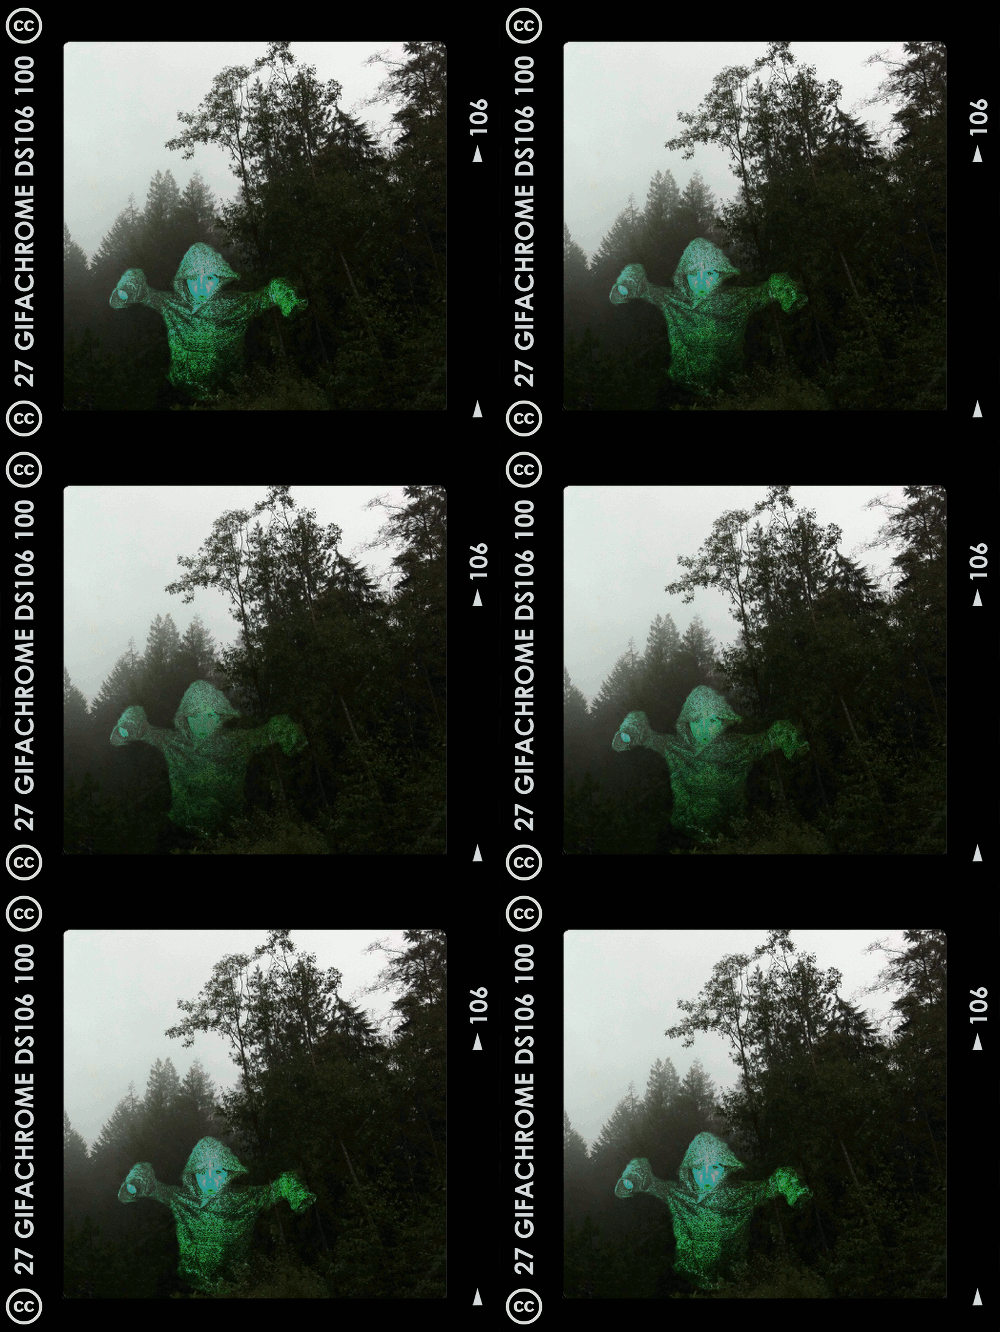
The past two weeks have been a blur. For the last two weeks of the Headless13 installment of ds106, several of us have been working together on a group project around a fictional camera called GIFaChrome.
How did this come about? While I was utterly swamped with work, I one day noticed a tweet or two referring to blog posts or G+ posts that had to do with something called “GIFaChrome.” Here is a page with a few Storify stories that explain how it all unfolded. The short story is that Rochelle Lockridge came up with the idea of putting an animated gif into a film frame and lots of people added in their ideas from there, including that there should be a camera that takes images and turns them into gifs (I think that was Mariana Funes’ idea). Then came the idea of putting glitched gifs into the frame, and so GLITCHaChrome was born (can’t recall the provenance of that one). John Johnston developed “LayerCake,” which allows for images to move OUT of the frame! There is also GIFaKidChrome, which makes animated gifs from the audio of children’s stories—that one was the product of spontaneous riffing on an image that originally came from a daily create assignment, a spot of riffing I was so sorry to miss but loved watching unfold.
I’ll do another blog post soon reflecting further on this GIFaChrome project and the Headless 13 course as a whole. This post is dedicated to explaining how I did the gif at the top of this post. This was meant to be part of the GIFaChrome story, as a testimonial from a beta tester (see my previous post).
For a daily create earlier in the course we were asked to make an image of another ds106 participant as a ghost. I was trying to do one of someone else when my son heard about what I was doing and insisted he wanted to be in the picture. Thus, he is the ghost.
Making a gif from the original image
Here’s the image I started with, which I made in GIMP. Here’s a link to it on Flickr, in which I explained briefly how I made it.
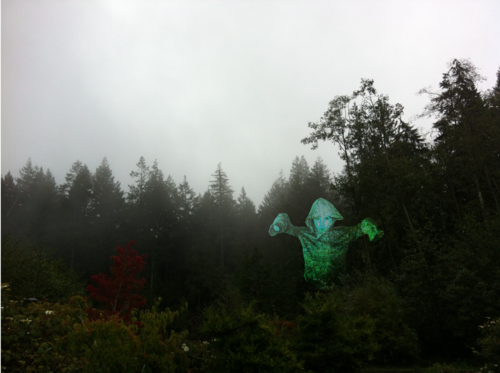
When I made this image in GIMP I had two separate layers, the one with my son as a ghost and the background forest layer. That made it easy to create a gif out of the image.
Before duplicating layers, I used the “blur” and “smudge” tools around the outside of the ghost layer so it didn’t look quite so “cut out” but more blended into the background a bit.
1. I first duplicated the image of my son as a ghost several times so I could have multiple layers to move around.
2. I wanted the ghost to “glow” a little, so what I did was select a layer, go to Color->Brightness-Contrast and played with the contrast a bit. Then I did the same only a little more for the next layer, and again for the next layer, then I started dialing it down gradually by the same amount for the next few layers so it would pulse a bit.
3. Then I moved each ghost layer a little bit to try to make the movement look smooth and somewhat ghost-like. At first I had the ghost move around in a circle, but my son nixed that: “Ghosts don’t move in circles, mommy. They move up and down.” Okay, so I started over and made it move up and down (and a little bit side to side too, even though that wasn’t what I intended at first). I had to keep making various layers visible and invisible (by clicking the “eye” icon next to them) so I could see how the ghost would move when it cycled through each layer.
3. In GIMP, if you go to Filters->Animation->Playback you can see what the animated gif will look like. Except that if you just have a bunch of ghost layers and one background layer you’ll just see the ghosts move and then the flash of the background. To see the finished product as it would really look, I had to duplicate the background so I had as many background layers as ghost layers, and put a background layer under each ghost layer.
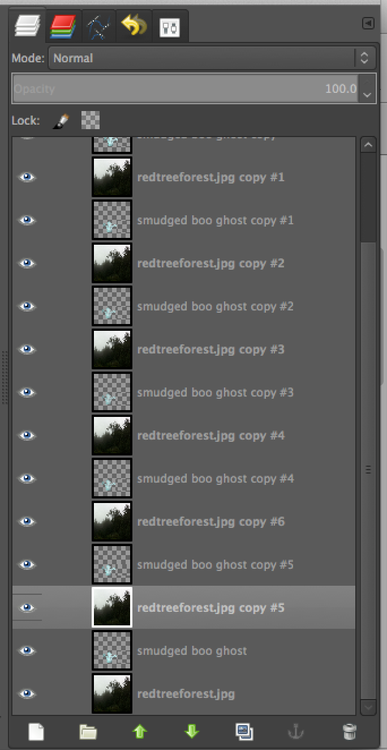
Then I had to control-click on each ghost layer and choose “merge down” so that each ghost layer merged with the background layer under it. Then, when going to Filters->Animation->Playback I could see what it would really look like.
5. The problem was that if I didn’t like the movement and wanted to re-do it, I was unable to do “undo” for enough times to get the layers unmerged. I was able to use “undo” for most of the layers, and then it just wouldn’t go back any further. So I’d have to close the file and start over, which kinda sucked because then I had to re-do the glow again from step 2. Boo.
6. Finally I had a nice looking gif, but the file was too big. So I first used the “crop” tool to crop the image to approximately a square, and then went to Image->Scale image to get it to about 450px x 450px.
Putting the GIFaChrome frame around the gif
Rochelle Lockridge provided a GIFaChrome template on her blog, which I downloaded. It was a photoshop file, but turns out that opened in GIMP just fine.
Here’s what I did to get my gif into the frame.
a. I first opened the GIFaChrome frame template in GIMP, and tried to use File->Open as layers to open up my GIMP xcf file with the gif I had just made. But what it kept doing was opening it up in one of the “layer groups” in the template file, which wasn’t going to work for animation. The screenshot below shows the various layer groups in the template files.
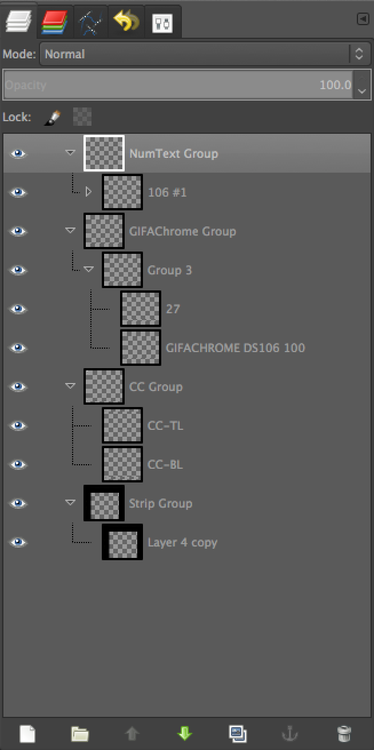
I realized I’d have to somehow get these groups into one layer so I could copy that layer and put it above each of the layers in my animated gif.
b. I discovered how to do this. First, I control-clicked on the top layer in one of the layer groups and chose “Merge layer group,” which put all the parts of the layer group into one layer.
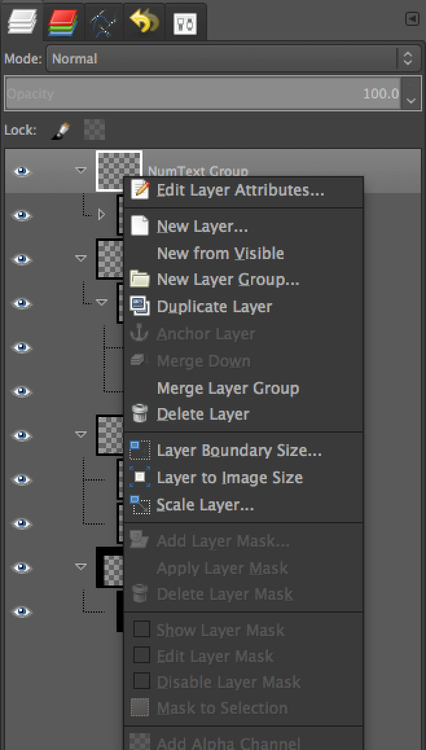
That gave me four layers instead of four layer groups. Then I had to get all those layers into one layer so I could duplicate the whole thing easily. I just control-clicked on each layer and chose “merge down” until I had one layer.
c. Then when I did File->Open as layers and opened the GIMP xcf file with my ghost gif in it, it simply opened all those layers onto new layers, not in any layer group. Perfect!
d. Of course, the frame layer was not the right size for my animated gif layers, so I had to scale the frame layer down so it would fit.
e. I duplicated the frame layer enough times to put one above each gif layer, and then used control-click on each frame layer and chose “merge down” (just as in step 3, above). Voila! I had layers that would animate as a gif just fine.
On the GIFaChrome website, this gif has sound attached, I think through the way John Johnston explains here. I don’t think I can do this on Tumblr, though maybe through the “html” function it would work. At any rate, it’s his own voice to go along with the image!
