Sisyphus animated gif

I am going to do an instructional video for one of my philosophy courses, on Albert Camus’ essay “The Myth of Sisyphus.” I spent quite awhile this morning looking around the web for videos or animated gifs of Sisyphus pushing the rock up the mountain, having it fall down again, and starting over. I wanted to use something like that for my course video. I found a few videos and gifs, but none of them were, so far as I could see, openly licensed.

What’s an instructor to do? Create their own animated gif, of course! Thanks to #ds106, I can.

Adapted from Sisyphus, by Nikolay Necheuhin, from The Noun Project.


It didn’t turn out exactly as I would have wished (do these things ever?); I would have liked to have had Sisyphus move the boulder in from the left after it falls down, but the icon of the man in the original wasn’t shaped in the right way for that to look good (he would have his hands in the air while pushing the boulder sideways!). And I just don’t have the time right now to change his arms so he is pushing the boulder sideways with them. That wouldn’t be too hard to do, really, with this black-and-white, blocky image, but I am out of time today.

Now, because it’s going into a video, I’ll either have to credit the original icon maker and The Noun Project in the credits, or put that info on the gif itself (I’d rather not), or just buy the icon from the Noun Project itself. Yeah, that’s the easiest thing…and I am getting so much value out of this one it’s way more than worth it!

I love how #ds106 is useful not just for fun (and it certainly is useful for that…we all need fun in our lives!) but also for my work. Excellent.


Two more…

I decided to add to the original by making the “sigh” obvious:

SisyphusGif-sigh


And then, because Camus says at the end of the short essay on Sisyphus that “we must imagine Sisyphus happy” (and my video will talk about this), I made one where he is very happy.

SisyphusGif-smiley-yay

These gifs are all openly licensed, CC BY 4.0


The process for the original

I used GIMP to make this animated gif.

After downloading the original icon from the Noun Project (see link in caption for the gif)…

  • I put a white layer under the transparent black icon.
  • I selected the rock using the circular select tool, did command-x to “cut” it, then created a new, transparent layer and used command-v to paste. In GIMP, that gives you a floating layer that you have to anchor down to the new layer you created.
  • I made a few duplicates of the transparent layer with just the rock.
  • I selected the man using the free select tool, and then pasted him onto one of the layers with just the rock. So then I had a transparent layer with just the man and the rock together, and some with just the rock (important for when the rock rolls down!). I also had a layer with just the mountain, and then the white background.
  • I merged the mountain layer to the white background layer and duplicated many times.
  • I duplicated the man-and-rock transparent layer many times.
  • Then it was just a matter of moving the man-and-rock layers up and up to the right, incrementally in the stack, putting a mountain layer beneath each one. (I keep forgetting to take screen shots while I’m in the process, to help explain!).
  • Similarly, on the top of the stack (GIMP animates from bottom of the stack to the top) I moved the just rock layers down and to the left incrementally in the stack, with mountain layers between each one.
  • At that point, what you should do is test the animation using Filters -> Animation -> Playback. You’ll get a bunch of white mountain layers between the moving man-and-rock layers so it looks a bit weird, but that way you can easily move the man-and-rock transparent layers against the white background if you need to.
    • If you do what I did, and merge the man-and-rock layers down to the white mountain layers before testing this out, then you have to do “undo” a bunch of times to unmerge them so you can move the man-and-rock again. I did this several times over. And if you save in between, I think “undo” only goes back as far as you saved. Because there were a few layers when he’s at the very top that I wanted to change the position of the man-and-rock of, but I couldn’t b/c I couldn’t unmerge them. D’oh.
  • When I was happy with the playback, I merged the man-and-rock and rock layers onto the mountain on white background layers.

Screenshot 2015-09-19 16.21.36

  • Then I added some pauses in the timing; I wanted there to be a pause before the rock rolls back down, and between when it rolls down and he starts over again. I also wanted there to be a pause when he starts up again, facing the mountain with his rock, like there’s a little sigh of here-we-go-again. To do that, I changed the titles of the layers to add millisecond timings: “start (500ms)”, “before rock falls (400ms)”, etc.


  • Then when I exported it as a .gif file, I slowed down the animation by putting in the box where it says “delay between frames where unspecified,” and changed that from 100 to 200 ms. Screenshot 2015-09-19 16.17.17


Number 2 as anvil

In the episode of The Prisoner called “Hammer into Anvil,” Number 2 pretty much loses it by the end. One part that really intrigued me was when he was shown towards the end stroking the penny farthing. I’ve seen some suggestions online about what the penny farthing is all about in the series, and in an interview McGoohan talks about the problems with progress…it seems to maybe have something to do with an ironic statement about the progress we have achieved (not much, really, despite our advances in technology). Maybe we haven’t progressed very far morally, for example.

So with that in mind, I find it very interesting that when Number 2 loses it he ends up stroking this ironic symbol of progress, as if he thinks it’s going to be his saviour. It’s what he believes in; it comforts him.

It’s also just a creepy sequence, as I tried to capture in this gif.

HammerIntoAnvil-ThePrisoner-long-fnl

the process

I made this in GIMP.

1. I used screencast-o-matic to do a screen capture of this part of the episode while it was playing on my computer.

2. I opened it in MPEG streamclip to capture just the frames I wanted, and then used “export other formats” and “as image sequence.” I exported to jpg with 8 frames per sec I think.

3. In GIMP, I had 32 layers, and I had to repeat some of them to get him to close his eyes again after he opens them. I just reversed those layers. So by the time I was done I had many, many layers, and I wanted to reduce the file size.

4. I cut out some of the layers, every other one, for part of the sequence. When I did it for all of it then parts were too choppy.

5. I resized the image to be 400px wide.

6. I tried changing the colour mode to “indexed” before saving, but that made the finished gif even bigger than it was before. Even when I set the max colours on indexed to 100!


So it’s 1.5 MB as is, which isn’t too bad.


And just for fun…

I created two more out of this sequence.

Eyes closed:


HammerIntoAnvilShorter


Now, just the eyes opening and closing:


HammerIntoAnvilEyes


GIFing A, B and C

For week 3 of #prisoner106, we were asked to do the “Animating The Prisoner” assignment.

I struggled with this one a lot for some unknown reason. I love making animated GIFs from video because technically, it’s pretty easy once you get the tools.

What I struggled with was finding sequences to animate from the episodes I’ve seen. I have a couple of ideas, but as this assignment is due in 1.5 hours, I figured I just do one so far and post it here.

In “A, B, and C,” Number 6 is drugged for two nights in a row and taken to a room where his dreams show up as videos on a screen, and they are manipulated from the outside to see if he was going to “sell out” (they wondered if maybe that’s why he retired). I was struck by the fact that there are two very similar sequences where the camera zooms in quickly on his wrist, where there are marks from the injections. In the first sequence, there is just one mark b/c it’s after the first night. After the second night, there are two.

I decided to animate these sequences to make it seem like it was just one mark, then he looks again and now it’s two, then he looks again and now it’s one, etc., etc.


OneMarkOrTwo-Prisoner106

The Process

I’m not sure I could explain it any better than is done in this great tutorial given here. I used MPEG Streamclip and GIMP as suggested in that tutorial, and used the settings given there.

I took a sequence of him sitting on his bed and then suddenly looking at his wrist and just duplicated it so it looks like he is doing the same motion but having different numbers of marks on his wrist every time he lifts it to see.

I keep getting a little frustrated at the pixelated colours on my gifs, but then discovered that the .gif format will only take about 256 colours, so there’s really not a lot you can do about this from what I can tell, when your source files have lots of colours and the gif will only have that many.

Jim Groom ransom gif

Jim Groom is an [edu] PUNK!!

Talky Tina has Jim Groom held hostage for RANSOM! And the ransom is that we need to make animated gifs of Mr. Jim Groom. We had until midnight. Well, it is 11:34 my time and so I think that counts, right?

Super true friend, please let him go? I see that he is still in his hut overnight, but hopefully he will be released in the morning.


Process!

I made this gif in GIMP.

1. I copied the original image, which had “edupunk” on his hands, a few times on different layers and labeled them “edupunk” for ease of reference later.

2. Then I took one of those layers and, using the “clone” tool, got rid of the “punk” so I just had “edu.” I saved that layer as “edu.”

3. Then I got rid of the “u” in “edu” using the clone tool, and saved that layer as “ed.” Same for eliminating the “d” and ended up with just an “E” layer. Then I erased the “E” and ended up with a “blank” layer.

4. I then had to order the layers and specify the time delay between them. I started with the blank layer, then used the “E” layer, then the “Ed” layer, then the “Edu” layer, then “edupunk.” I alternated the “Edu” and “edupunk” layers to get the “blinking” effect, ending with an “edupunk” layer. The part I spent the longest on was specifying the delay between layers to get the effect I wanted. You can see what I chose in the screenshot below (it is just missing the very last “edupunk” layer, which was 600ms).

Screen Shot 2015-03-14 at 11.46.23 PM

6. Then I had a heck of a time because though the delay was right when I used “filter,” “animation,” “playback” in the GIMP menu, when I exported the file to a gif file it just gave the same delay to all the frames (looked like about 100 ms). After some web searching, and having been fooled by a tutorial on time delays that told me otherwise, I found that what I had done wrong was put a space between the number and the “ms”, like: (600 ms). Wrong. Need to take out the space and then it works!

Burpees for Bobby

Greg McVerry asked ds106 participants to make something to promote a campaign called “Burpees for Bobby,” which helps out Greg’s nephew, baby Bobby, who has a type of leukodystrophy. Do a web search about it and you’ll weep as I did. You can donate to the cause, here.

I was looking around for drawings of burpees that were openly licensed so I could make an animation, but I couldn’t easily find any. So I made my own, modeled on a stick figure drawing I found on the web, but can’t now find anymore for some reason. I used the Paper 53 app to do it, then sent it to myself over email.

My burpee drawing
My burpee drawing on Paper 53 app

I opened the jpg and did screen shots of each of the parts to put them on separate layers in GIMP. I had to fiddle around with scaling the layers to get the stick figures to be approximately the same size–the heads and bodies of each one ended up different sizes when I did the screen shots.

Then I opened new white layers in GIMP and added the text layers to the beginning and end. To get the “GO!!” to flash, I just alternated the GO layers with blank white layers.

I repeated the burpee sequence 3 times, then gave my poor stick figure a rest for a little while, then started the animation over again.

The only tricky thing here was to get the timing of the animation right. I had to go back and figure out how to specify the duration of each layer in an animation by adding it to the layer name in milliseconds, such as shown in this screen shot:

Screen Shot 2014-08-25 at 11.24.20 PM

Here’s the finished product! The one thing I’d change if it weren’t late and I didn’t need to go to bed is that the jumping person doesn’t really look like they’re jumping but rather standing and raising their arms. Would need to raise that figure up a bit. But bed calls…

BurpeesForBobby

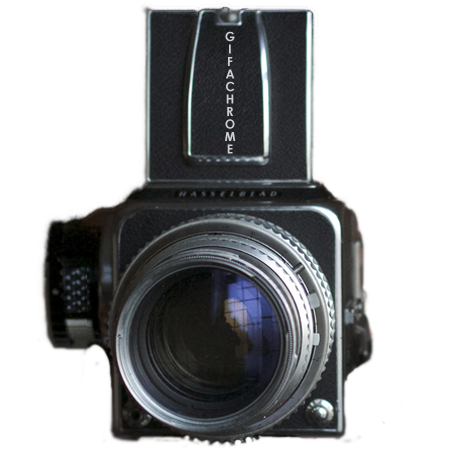
GIFaChrome…what the…?

GIFaChrome…what the…?

That’s what I thought when I first saw a tweet leading me to a blog post or G+ post about the GIFaChrome. I had been participating off and on in the “headless 13” edition of ds106 during the Fall of 2013. I’ll be writing another post very soon reflecting on the course as a whole and it’s “headless” nature. Here I want to focus on GIFaChrome.

I was only able to drop in and out of this iteration of ds106, given that I was teaching full time and doing a good deal of service work and research on top of that. It was an insanely busy term. So I missed a few things during the course, though I usually tried to at least look at most of the stuff people were making, even if I didn’t comment on it.

But at one point I felt I had missed something. Rochelle Lockridge was talking about a GIFaChrome camera and 106 film, and I had no clue what was going on. I figured that I blinked and missed the story, and tried hard to look back at G+, Twitter, blog posts to find the missing pieces. Turns out, though, that the story had yet to unfold. It was an idea that was put together through the collaboration of many people, including Rochelle, Mariana Funes, John Johnston and Alan Levine. The story evolved and changed from hour to hour, as people put in new ideas and created new artworks.

Mariana created an animated glitch gif with the new GIFaChrome camera, and John Johnston came up with the GLITCHaChrome camera idea. He also created a nifty little app that makes glitch giffing easy! (linked in the previously-linked post of his). Pretty soon several more glitch gifs popped up and found their way into the GLITCHaChrome frame (such as some by Janet Webster, Vivien Rolfe), including some in our collaborative gif story over at Giffi.us.

At some point around this time the weekly post came out explaining what we’d be doing for the last two weeks of the headless ds106: a final story project.  I knew that even though classes had finished for me by this time, I would still be too busy with marking essays and final exams to put together a whole story on my own. And, as I had volunteered for those last two weeks, the extent of my being “in charge” was to ask the other people who had also volunteered if we should suggest to people that they might do their project in a group. From there, Mariana suggested we work on developing the GIFaChrome story further, and invite anyone who wanted to join in to help. Sounded great to me!

Mariana and Rochelle put together a couple of Storify stories to explain what the GIFaChrome project is, its very short history, so that anyone who wanted to join in could potentially find their way into the project without being too lost. We had a Google Doc where we brainstormed ideas on what to add to the story. We decided to create a GIFaChrome website, a wikipedia page, an Amazon product page, several testimonials from beta testers, commercials, and more. You can see it all by perusing the GIFaChrome page/

We wanted to include a previous riff-a-gif flash mob project that had started as a daily create and turned into a riff on Alice in Wonderland. It became the GIFaKidChrome, thanks to Mariana (at least, I think this was her idea!). And John Johnston came out with another emerging technology, “Layercake,” that allows gifs to move out of the frame.

Alan Levine had a pipeline to a mysterious source that was leaking information about GIFaChrome: here is a stolen schematic diagram for the camera, here is an amazing announcement of a breakthrough technology that allows the GIFaChrome to tunnel back into a person’s past when visiting the website, and here is a video by a competitor camera company, Hasselhlof.

Mariana and Rochelle…what didn’t they do for this project?! They made numerous gifs, turned Mariana’s dog Colin into the GIFaChrome mascot (and Vivien Rolfe made a lovely movie poster for Colin’s next movie…see the bottom of that page!), got Jonathan Worth to agree to be a spokesperson for GIFaChrome, sending us an audio testimonial (see the front page of the website), and more I don’t even know about. Rochelle created the GIFaChrome website, and spent who knows how long creating blog posts and pages for all the things that everyone else was creating, more stuff every hour! Mariana put together a board on Pinterest where intrepid reporter Rita Skeeter tried to undermine the GIFaChrome by spreading nasty rumours.

A couple of us had fun with Mozilla’s Xray Goggles that one can use to change web pages. Jess Hobbs made an Amazon product page for the GIFaChrome, and I tried my hand at making a Wikipedia article for it. I learned that you really can’t do much more than delete and paste things into pages with Xray goggles, as it doesn’t allow you to create new sections or radically change the page. I also had trouble with the footnotes (which I couldn’t really fix with the method discussed in this blog post, because every time I saved the page it had a new URL so my footnotes kept getting broken).

I also made a gif that I put into the GIFaChrome film frame, a gif of my son as a ghost—as described here (in which I wrote a testimonial by the “boo ghost” for the GIFaChrome) and here (in which I explain the process of what I did to get the gif into the GIFaChrome film frame). I also recorded audio of my son to go with the gif; the original audio, in which he’s making his oooooo-ooooo-booooo sound is on the first post linked in this paragraph, and for an audio testimonial I interviewed him and Rochelle Lockridge artfully edited the interview to come up with the audio you can hear here. 

I did a few other audio works for our radio show product launch, and I’ll discuss those in a separate post.