Radio Show Archives

See the Radio Show Archives at the GifAChrome site–we did a good deal of audio for GifAChrome!

GIFaChrome commercial

I also scripted and recorded a commercial with my 6-year-old son for the GIFaChrome camera. I recorded his and my sections separately and then edited them together using Audacity. He never really quite understood what he was talking about when he said his lines, but he was a good sport!

I got the music for this commercial from Kevin McLeod’s free music site, incompetech.com (all music there is licensed CC-BY). The piece I used is called “Friendly Day.”

In addition to these two audio pieces I did for the radio show, I acted as co-host for the GIFaChrome launch with Alan Levine. This was our second time co-hosting a radio show for the Headless 13 ds106, as we also worked together hosting a three-hour show during which we played all the group radio shows for this course. You can find the whole show, broken up into pre- and post-show discussions of each, here.

But back to the GIFaChrome launch. The idea for this radio show was to have a party atmosphere, as if we were broadcasting from a live party during which the camera would officially be launched. Alan Levine has a great summary of the radio show launch and how he managed a number of the audio effects, including the party sounds. Alan had all the audio pieces on his computer and designed the script for the show. The whole show, as well as the various pieces, can be heard from Alan’s post about the show. As usual, I just sat back on the Skype and talked while he handled the technical end of things. But I have learned enough in ds106 by now that I should be able to run a radio show with multiple people on Skype at the same time. It’s not just a straightforward thing, but I just need to try and ask people along the way and eventually I’ll get it to work. Sitting around wishing I could do it is going to get me nowhere.

Afterwards, we had a Headless 13 ds106 radio campfire, in which anyone who wanted to join in could call Alan on Skype and discuss their Headless experience. Alan has an archive of that radio discussion as well. I had to leave partway through, as that day was insanely busy for me, but it was great to be able to reflect on how this whole Headless thing worked, with others.

And speaking of reflecting on the Headless thing, that is what I do in the next post!

Radio Show Archives

Radio Show Archives:

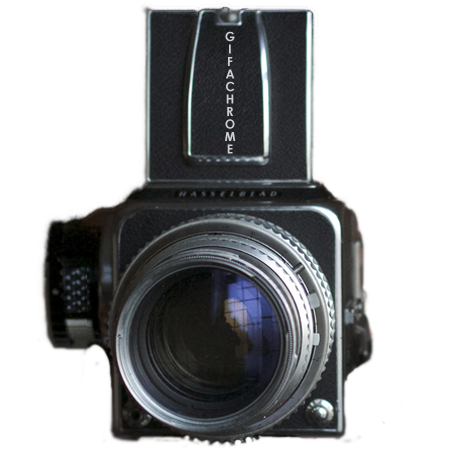
As if just doing the GIFaChrome project weren’t enough during the Headless version of ds106 in the Fall of 2013 (see the previous post for a description and rundown of what we did), we also decided to have a radio show product launch of the GIFaChrome camera. Quite a few people did amazing audio for this radio show, all of which you can hear at the Radio Show Archives link given at the top of this post.

Here I will just say a few things about the audio that I did for the radio show. I can’t believe how quickly all this came together—we basically did the entire project and the radio show in 1.5 weeks. I managed to squeeze out two audio projects in just a couple of days.

Roxy Louridge archival audio

I had the idea early on in the project that we could say we’ve found some old audio from the very first creator of the GIFaChrome film. I cam up with a story, the name (clearly a play on Rochelle Lockridge, or Rocky Lou, the CEO for GIFaChrome), and the name of Roxy’s dog, Corlin (a play on the GIFaChrome mascot, Colin Dog, who lives with Mariana Funes). The only problem was that I wanted to have it be scratchy, as if it were from an old phonograph recording that was heavily damaged such that the audio gets completely covered over by the “scratch noises” at crucial parts. Rochelle said she could use an effect in Garage Band to simulate this, and voila….

GIFaChrome commercial

I also scripted and recorded a commercial with my 6-year-old son for the GIFaChrome camera. I recorded his and my sections separately and then edited them together using Audacity. He never really quite understood what he was talking about when he said his lines, but he was a good sport!

I got the music for this commercial from Kevin McLeod’s free music site, incompetech.com (all music there is licensed CC-BY). The piece I used is called “Friendly Day.”

In addition to these two audio pieces I did for the radio show, I acted as co-host for the GIFaChrome launch with Alan Levine. This was our second time co-hosting a radio show for the Headless 13 ds106, as we also worked together hosting a three-hour show during which we played all the group radio shows for this course. You can find the whole show, broken up into pre- and post-show discussions of each, here.

But back to the GIFaChrome launch. The idea for this radio show was to have a party atmosphere, as if we were broadcasting from a live party during which the camera would officially be launched. Alan Levine has a great summary of the radio show launch and how he managed a number of the audio effects, including the party sounds. Alan had all the audio pieces on his computer and designed the script for the show. The whole show, as well as the various pieces, can be heard from Alan’s post about the show. As usual, I just sat back on the Skype and talked while he handled the technical end of things. But I have learned enough in ds106 by now that I should be able to run a radio show with multiple people on Skype at the same time. It’s not just a straightforward thing, but I just need to try and ask people along the way and eventually I’ll get it to work. Sitting around wishing I could do it is going to get me nowhere.

Afterwards, we had a Headless 13 ds106 radio campfire, in which anyone who wanted to join in could call Alan on Skype and discuss their Headless experience. Alan has an archive of that radio discussion as well. I had to leave partway through, as that day was insanely busy for me, but it was great to be able to reflect on how this whole Headless thing worked, with others. 

And speaking of reflecting on the Headless thing, that is what I do in the next post!

GIFaChrome…what the…?

GIFaChrome…what the…?

That’s what I thought when I first saw a tweet leading me to a blog post or G+ post about the GIFaChrome. I had been participating off and on in the “headless 13” edition of ds106 during the Fall of 2013. I’ll be writing another post very soon reflecting on the course as a whole and it’s “headless” nature. Here I want to focus on GIFaChrome.

I was only able to drop in and out of this iteration of ds106, given that I was teaching full time and doing a good deal of service work and research on top of that. It was an insanely busy term. So I missed a few things during the course, though I usually tried to at least look at most of the stuff people were making, even if I didn’t comment on it.

But at one point I felt I had missed something. Rochelle Lockridge was talking about a GIFaChrome camera and 106 film, and I had no clue what was going on. I figured that I blinked and missed the story, and tried hard to look back at G+, Twitter, blog posts to find the missing pieces. Turns out, though, that the story had yet to unfold. It was an idea that was put together through the collaboration of many people, including Rochelle, Mariana Funes, John Johnston and Alan Levine. The story evolved and changed from hour to hour, as people put in new ideas and created new artworks.

Mariana created an animated glitch gif with the new GIFaChrome camera, and John Johnston came up with the GLITCHaChrome camera idea. He also created a nifty little app that makes glitch giffing easy! (linked in the previously-linked post of his). Pretty soon several more glitch gifs popped up and found their way into the GLITCHaChrome frame (such as some by Janet Webster, Vivien Rolfe), including some in our collaborative gif story over at Giffi.us.

At some point around this time the weekly post came out explaining what we’d be doing for the last two weeks of the headless ds106: a final story project.  I knew that even though classes had finished for me by this time, I would still be too busy with marking essays and final exams to put together a whole story on my own. And, as I had volunteered for those last two weeks, the extent of my being “in charge” was to ask the other people who had also volunteered if we should suggest to people that they might do their project in a group. From there, Mariana suggested we work on developing the GIFaChrome story further, and invite anyone who wanted to join in to help. Sounded great to me!

Mariana and Rochelle put together a couple of Storify stories to explain what the GIFaChrome project is, its very short history, so that anyone who wanted to join in could potentially find their way into the project without being too lost. We had a Google Doc where we brainstormed ideas on what to add to the story. We decided to create a GIFaChrome website, a wikipedia page, an Amazon product page, several testimonials from beta testers, commercials, and more. You can see it all by perusing the GIFaChrome page/

We wanted to include a previous riff-a-gif flash mob project that had started as a daily create and turned into a riff on Alice in Wonderland. It became the GIFaKidChrome, thanks to Mariana (at least, I think this was her idea!). And John Johnston came out with another emerging technology, “Layercake,” that allows gifs to move out of the frame.

Alan Levine had a pipeline to a mysterious source that was leaking information about GIFaChrome: here is a stolen schematic diagram for the camera, here is an amazing announcement of a breakthrough technology that allows the GIFaChrome to tunnel back into a person’s past when visiting the website, and here is a video by a competitor camera company, Hasselhlof.

Mariana and Rochelle…what didn’t they do for this project?! They made numerous gifs, turned Mariana’s dog Colin into the GIFaChrome mascot (and Vivien Rolfe made a lovely movie poster for Colin’s next movie…see the bottom of that page!), got Jonathan Worth to agree to be a spokesperson for GIFaChrome, sending us an audio testimonial (see the front page of the website), and more I don’t even know about. Rochelle created the GIFaChrome website, and spent who knows how long creating blog posts and pages for all the things that everyone else was creating, more stuff every hour! Mariana put together a board on Pinterest where intrepid reporter Rita Skeeter tried to undermine the GIFaChrome by spreading nasty rumours.

A couple of us had fun with Mozilla’s Xray Goggles that one can use to change web pages. Jess Hobbs made an Amazon product page for the GIFaChrome, and I tried my hand at making a Wikipedia article for it. I learned that you really can’t do much more than delete and paste things into pages with Xray goggles, as it doesn’t allow you to create new sections or radically change the page. I also had trouble with the footnotes (which I couldn’t really fix with the method discussed in this blog post, because every time I saved the page it had a new URL so my footnotes kept getting broken).

I also made a gif that I put into the GIFaChrome film frame, a gif of my son as a ghost—as described here (in which I wrote a testimonial by the “boo ghost” for the GIFaChrome) and here (in which I explain the process of what I did to get the gif into the GIFaChrome film frame). I also recorded audio of my son to go with the gif; the original audio, in which he’s making his oooooo-ooooo-booooo sound is on the first post linked in this paragraph, and for an audio testimonial I interviewed him and Rochelle Lockridge artfully edited the interview to come up with the audio you can hear here. 

I did a few other audio works for our radio show product launch, and I’ll discuss those in a separate post.

How I got the boo ghost into the GIFaChrome film

image

The past two weeks have been a blur. For the last two weeks of the Headless13 installment of ds106, several of us have been working together on a group project around a fictional camera called GIFaChrome.

How did this come about? While I was utterly swamped with work, I one day noticed a tweet or two referring to blog posts or G+ posts that had to do with something called “GIFaChrome.” Here is a page with a few Storify stories that explain how it all unfolded. The short story is that Rochelle Lockridge came up with the idea of putting an animated gif into a film frame and lots of people added in their ideas from there, including that there should be a camera that takes images and turns them into gifs (I think that was Mariana Funes’ idea). Then came the idea of putting glitched gifs into the frame, and so GLITCHaChrome was born (can’t recall the provenance of that one). John Johnston developed “LayerCake,” which allows for images to move OUT of the frame! There is also GIFaKidChrome, which makes animated gifs from the audio of children’s stories—that one was the product of spontaneous riffing on an image that originally came from a daily create assignment, a spot of riffing I was so sorry to miss but loved watching unfold.

I’ll do another blog post soon reflecting further on this GIFaChrome project and the Headless 13 course as a whole. This post is dedicated to explaining how I did the gif at the top of this post. This was meant to be part of the GIFaChrome story, as a testimonial from a beta tester (see my previous post)

For a daily create earlier in the course we were asked to make an image of another ds106 participant as a ghost. I was trying to do one of someone else when my son heard about what I was doing and insisted he wanted to be in the picture. Thus, he is the ghost.

Making a gif from the original image

Here’s the image I started with, which I made in GIMP. Here’s a link to it on Flickr, in which I explained briefly how I made it. 

image

When I made this image in GIMP I had two separate layers, the one with my son as a ghost and the background forest layer. That made it easy to create a gif out of the image.

Before duplicating layers, I used the “blur” and “smudge” tools around the outside of the ghost layer so it didn’t look quite so “cut out” but more blended into the background a bit.

1. I first duplicated the image of my son as a ghost several times so I could have multiple layers to move around.

2. I wanted the ghost to “glow” a little, so what I did was select a layer, go to Color->Brightness-Contrast and played with the contrast a bit. Then I did the same only a little more for the next layer, and again for the next layer, then I started dialing it down gradually by the same amount for the next few layers so it would pulse a bit.

3. Then I moved each ghost layer a little bit to try to make the movement look smooth and somewhat ghost-like. At first I had the ghost move around in a circle, but my son nixed that: “Ghosts don’t move in circles, mommy. They move up and down.” Okay, so I started over and made it move up and down (and a little bit side to side too, even though that wasn’t what I intended at first). I had to keep making various layers visible and invisible (by clicking the “eye” icon next to them) so I could see how the ghost would move when it cycled through each layer. 

3. In GIMP, if you go to Filters->Animation->Playback you can see what the animated gif will look like. Except that if you just have a bunch of ghost layers and one background layer you’ll just see the ghosts move and then the flash of the background. To see the finished product as it would really look, I had to duplicate the background so I had as many background layers as ghost layers, and put a background layer under each ghost layer.

image

Then I had to control-click on each ghost layer and choose “merge down” so that each ghost layer merged with the background layer under it. Then, when going to Filters->Animation->Playback I could see what it would really look like.

5. The problem was that if I didn’t like the movement and wanted to re-do it, I was unable to do “undo” for enough times to get the layers unmerged. I was able to use “undo” for most of the layers, and then it just wouldn’t go back any further. So I’d have to close the file and start over, which kinda sucked because then I had to re-do the glow again from step 2. Boo.

6. Finally I had a nice looking gif, but the file was too big. So I first used the “crop” tool to crop the image to approximately a square, and then went to Image->Scale image to get it to about 450px x 450px.

Putting the GIFaChrome frame around the gif

Rochelle Lockridge provided a GIFaChrome template on her blog, which I downloaded. It was a photoshop file, but turns out that opened in GIMP just fine.

Here’s what I did to get my gif into the frame.

a. I first opened the GIFaChrome frame template in GIMP, and tried to use File->Open as layers to open up my GIMP xcf file with the gif I had just made. But what it kept doing was opening it up in one of the “layer groups” in the template file, which wasn’t going to work for animation. The screenshot below shows the various layer groups in the template files.

image

I realized I’d have to somehow get these groups into one layer so I could copy that layer and put it above each of the layers in my animated gif. 

b. I discovered how to do this. First, I control-clicked on the top layer in one of the layer groups and chose “Merge layer group,” which put all the parts of the layer group into one layer.

image

That gave me four layers instead of four layer groups. Then I had to get all those layers into one layer so I could duplicate the whole thing easily. I just control-clicked on each layer and chose “merge down” until I had one layer.

c. Then when I did File->Open as layers and opened the GIMP xcf file with my ghost gif in it, it simply opened all those layers onto new layers, not in any layer group. Perfect! 

d. Of course, the frame layer was not the right size for my animated gif layers, so I had to scale the frame layer down so it would fit.

e. I duplicated the frame layer enough times to put one above each gif layer, and then used control-click on each frame layer and chose “merge down” (just as in step 3, above). Voila! I had layers that would animate as a gif just fine. 

On the GIFaChrome website, this gif has sound attached, I think through the way John Johnston explains here. I don’t think I can do this on Tumblr, though maybe through the “html” function it would work. At any rate, it’s his own voice to go along with the image!

This is a guest post by the boy ghost in the image above, who…


This is a guest post by the boy ghost in the image above, who has chosen to remain anonymous.

I am so thrilled about my beta test of the GIFaChrome camera! I was able to get a version of the camera from my friend Ina, and she kindly agreed to take an image of me that shows my real nature. If you hover over the right side of the image above you can see an arrow pointing to the old image Ina took of me, a boring old still image. It does me no justice, as you can tell when comparing it to my GIFaChrome image. Whoever heard of a ghost that doesn’t glow and move?

This camera is so easy to use: all you do is point and click and a beautiful animated gif appears. It’s like magic! You don’t even have to have full material substance to work the thing, as I have been able to play around with it myself (though I still need practice, and this pic by Ina is the best image so far).

The only thing that is missing from the GAC image is my lovely “booooooo-oooooooo-oooooo” sound that I tend to make when floating in this way. But those people over at GIFaChrome are so clever, I expect this will be available in a software update soon!

The GIFaChrome launches December 13, 2013. To pre-order yours, go to the GIFaChrome website!

Here is my ooooooo-oooooooo-booooo sound, just so you know what a lovely voice I have!

Using X-Ray goggles to remix a website for the first time

I’m working with some other people in the Fall 2013 Headless version of ds106 on a final project in which we are creating a website and various media around an artificial product called the GIFaChrome camera. One thing I volunteered to do is to use Mozilla’s X-ray goggles to remix a wikipedia page to make it talk about the GIFaChrome. 

This has been pretty easy so far, mostly because I have some basic html (I mean basic, like I can do a link and sometimes, if I look it up, I know how to insert an image). 

Here’s what I’ve got so far. I can do the text, and I can even figure out how to replace the images (though I haven’t done that yet). I even managed to make one of the footnotes go to the right page (originally when you clicked on the footnotes they went to the original page rather than the remixed page). What I did is link the footnote to simply the remixed page plus “#References”: http://clhendricksbc.makes.org/goggles/clhendricksbcs-remix-of-kodak-stereo-camera-wikipedia-the-free-encyclopedia-4#References

This made the footnote jump to the end of the page. Score! Except that I will have to change these links once the page is fully done because the link is to the page as it is now, and each time I save it it becomes a new link (with a new number at the end: 4, 5, 6, etc.). So we’ll see if this actually ends up working in the end.

The thing I’m struggling with at the moment is the table of contents. When you click on the TOC links, they go to the original page contents, and the same for the footnotes. My html skills are not good enough to figure out how to fix this so that the TOC links go to the remixed website contents and the same for the footnotes. 

The problem with the TOC is that when I use the X-ray goggles I just get this: 

image

This doesn’t give me a link to any page, so I can’t change the link. But when I click on the link in the remixed page it goes to the “description” section of the original page, not the remixed page.

Probably I shouldn’t worry about this and maybe just take the TOC and out entirely, but I’d love it if I could fix it!

Any ideas?