This small patch of pond

ThisSmallPatchOfPond-tdc892-med

ds106 daily create for June 18, 2014: “Go out into your yard (or jump the fence into your neighbor’s yard) and find an interesting piece of ground. Zoom in with your camera’s lens, and take a picture. Share your square piece of Earth with the world.”

So it was kinda late by the time I got to this daily create, and I cheated by making it a patch of pond rather than a patch of earth, and even more by taking a photo of a patch of pond on our kitchen counter.

My son, 6 years old, is raising tadpoles in a very large saucepan. We have gathered rocks, pond water, and water plants and made a small environment for them. We feed them boiled lettuce, which they seem to love, and change half the water every day. It’s really fun–one of them has newly grown legs!

I played around a LOT with the macro lens and settings on our camera, and eventually needed to set up the tripod and set the timer delay to 2 seconds so that my pressing the shutter button didn’t shake the camera. This was the best out of the shots.

 Here is the photo on Flickr.

Mama and Boo Ghost at the aurora

MamaBooGhostAurora-June2014

I decided to combine the ds106 daily create for June 6, 2014: “Make a picture of yourself in a place you’ve always wanted to go but haven’t been yet” with my participation in the summer ds106 experience over at https://thebergerons.wordpress.com/

So here is the Boo Ghost and me as Mama Ghost at an aurora. I’ve always wanted to see an aurora borealis in person, but never have.

The background image of the aurora is by Omar Smith, and licensed CC-BY.

The process

In GIMP, I opened up both the aurora image linked above and an image of me and my son in Australia from September 2012. To cut us out of the original image I used the process described here, which involves using the “paths” tool–something I’ve never done before. In case that page disappears, here are the steps.


1. Click on the “paths” tool and go around the parts of the image you want to “cut out.” When you reach the first path marker, be sure to hold down the “control” button when you click that first marker to close the loop (although if I remember correctly, on my Mac the control button didn’t work and I think I had to use the “command” button, but my memory is fuzzy on this).

— Then you can move the anchor points around with the mouse to adjust where they are and adjust what is being outlined, which is nice.


2. In the window that has the layers in GIMP (see screenshot below), click on the little white button that looks like it has two sliders. You should be able to there choose “selection from path” (you can’t see it in the screenshot because I’ve already done it and I can’t recreate it…this is just to show the white “slider” button). This creates a selection from the path.

Screen Shot 2014-06-06 at 7.42.10 PM

3. Create an alpha channel–this means to give the image transparency, so when you cut out part of it you don’t get white space but a transparent space so the image underneath it will show through. Go to “layer” on the top menu and choose “transparency,” then “add alpha channel.”

— This step is really important for the part where I had to erase something (see step 5).


4. Now you need to cut out the background from what you’ve selected, so you need to invert the selection and cut out that part. Go to “select” on the top menu, then choose “invert.” Then you can just use control-x or command-x (for the Mac) to cut out the background. You should just have the piece you created a path around on a background that looks like a checkerboard (see top layer in screen shot above).


5. For mine, I still had part of the original image between myself and my son, between my left arm and his right arm. I needed to get rid of that, so I just used the “eraser” tool and erased it. What was underneath was just transparency, so the aurora image showed through. If I hadn’t added the alpha channel, when I erased part of the image I’d get a white space there.

— I also needed to erase around some of me and my son because there was a bit of the original image around the edges, which looked strange


6. I had to scale the layer (top menu: layer->scale layer) to make it a bit smaller, and then move it where I wanted.


7. Then the fun began with playing with the colours of the layer with me and my son. I just messed around with Colors->Curves until I got something that looked kind of ghosty. Then I reduced the opacity of that layer (with the slider on the top of the screenshot above) so we were kind of transparent. Finally, I used the “blur” tool to go around the outlines of me and my son so we didn’t have such sharp outlines. It made us blend into the background image a bit more.


8. I didn’t collapse the two layers into one (which you could do by right-clicking on the top layer (or control-clicking, on a Mac) and choosing “merge down), but left them separate in case I wanted to adjust the layer with me and my son more. Having it separate means you can adjust colours, etc. on that layer alone.


9. I then exported as a jpg and voila…


Headline Mashup Visual

Vader-JarJar-Selfie
ds106 dailycreate for December 5, 2013: “Create a visual that might accompany one of the mashed up headlines from @twoheadlines.”

The original tweet: https://twitter.com/TwoHeadlines/status/407970369447161856


So this is supposed to be Vader taking a selfie but it’s Jar Jar that appears as his own image instead of Vader, like Vader is actually Jar Jar. Now that I think about it later, though, it just looks like he’s watching Jar Jar on the ipad. D’oh. My idea was a little too complicated to come out well in a visual image. Oh well…it took me long enough to get this done at all I’m not going to go back and fix it now.


The process (in GIMP)


I got the Vader image from the GIF Fight tumblr from August 2013—I had remembered this image from last summer. You can see the cool gifs people made with this image on the GIF Fight tumblr arhive for Aug 2013.

I then got an image of an ipad from Flickr; it took awhile to find one that was in approximately the right angle. Here’s the one I used: “iPad car mount,” by Jan Hammershaug, licensed CC-BY.

Lastly I had to figure out what should be on the ipad screen. I tried to find a good Yoda image that was openly licensed, but no dice. So why not Jar Jar Binks? Here’s the image I used: “Jar Jar Binks at SGTTC2010,” by Parka, licensed CC-BY-SA.

I first put the ipad in Vader’s hand by scaling it to the right size and then selecting around it by going to Select->Float, then Layer->To New Layer to get the ipad onto a new layer. I then deleted the rest of that image with the ipad.

I got Vader’s finger in front of the ipad the same way: I selected around the finger, floated the selection, then put it on a new layer so I could put it in front of the ipad.

Then I selected around the original image that was inside the ipad frame, did Select->Float and then Layer->to new layer to get that image out of the ipad frame. I then deleted the new layer with the image that was originally inside the ipad frame.

Finally, I had to crop the Jar Jar image and scale it so it would be small enough to fit inside the ipad frame.

Now I had layers in this order:

1. finger

2. ipad frame

3. Jar jar

4. the rest of the vader image

But of course, the Jar Jar image wasn’t at the right angle to look like it was actually on the ipad. That’s when I discovered the “perspective” tool in GIMP, which lets you warp a layer so it takes on a new perspective. I played with this a bit, moving various corners various amounts to see what it looked like, until I got the perspective looking pretty good.

I also had to play around with scaling the Jar Jar layer so that it didn’t stick out the sides of the ipad frame but still fit within it. In the end I had to use the paintbrush tool to cover over some parts of the image that were a little too small for the frame and some of the background was showing through. But it works okay.

I’m amazed I got this to look pretty much like I pictured it when I thought of it.

This image is licensed CC-BY-SA: https://creativecommons.org/licenses/by-sa/3.0/

601 backwards

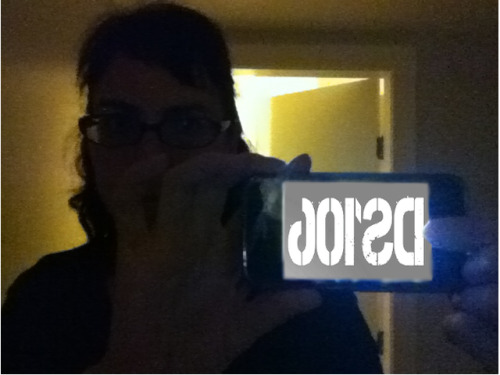
DS106 Daily Create for Aug. 31, 2013 (yep, a couple of days late!): “This is TDC 601! That is 106 backwards! Draw something 106ish backwards.”

This one was challenging for me—I could make a video or a gif of something going backwards, but I was struggling with how to make a still image of something backwards. Okay, maybe draw the back of a kitchen monster that people created for TDC595.

But then I thought…what is something ds106ish? well, me! and you! So why not take an image of me backwards? Thus the mirror.
My original idea was to have my camera showing the ds106 logo on the camera itself, and then take a photo of that. Ha! In what universe did I think it would be possible for my phone to be using one application (to show the ds106 logo (on the web) and then also use the camera app at the same time? Not.

So I took the photo using the camera app (of course), and then did a screen shot of the ds106 logo from the ds106 page.

I opened both in GIMP as layers, and made a layer mask for the image of me so that the part inside the phone would be transparent and I could put the ds106 layer under that so it’d show through.
1. First, I drew a selection around the phone display with the “lasso,” or “free select” tool, so I could go around my finger on the camera button.

2. I then did Selection->invert, which makes everything around the camera display selected, which is needed for the next step.

3. Layer->create layer mask, which made the phone display transparent and everything around the phone display in the image show up.

4. Scale the size of, and position the ds106 layer so it’s in the right place, peeking out through the transparent hold in the layer of me above it.

5. Because the dividing line between the two images around the camera display was pretty sharp and harsh, I used the blur/sharpen tool to do a little blurring around the edge of the camera display. I think I did bit much of that, but no time to go back and fix it.

6. I also played a bit with the brightness and contrast and other settings under “color” for the ds106 layer—I wanted it to look a bit like it was glowing, shedding light on my finger and out beyond the display screen. That was a hard effect to get, and it’s not quite what I was hoping for, but upping the brightness did help.

P.S. tumblr sometimes bums me out. I don’t set my images to be as wide as this column, b/c that does weird things to them. But now it made this one have white lines a the vertical edges for some reason. Boo.

It’s not really a drawing, but I have yet to feel comfortable enough with drawing to do many of those. It’s one of the parts of ds106 I just need to force myself into to get more confident about it. Everything else I love doing; drawing, well, not so much.

Turn that frown upside down

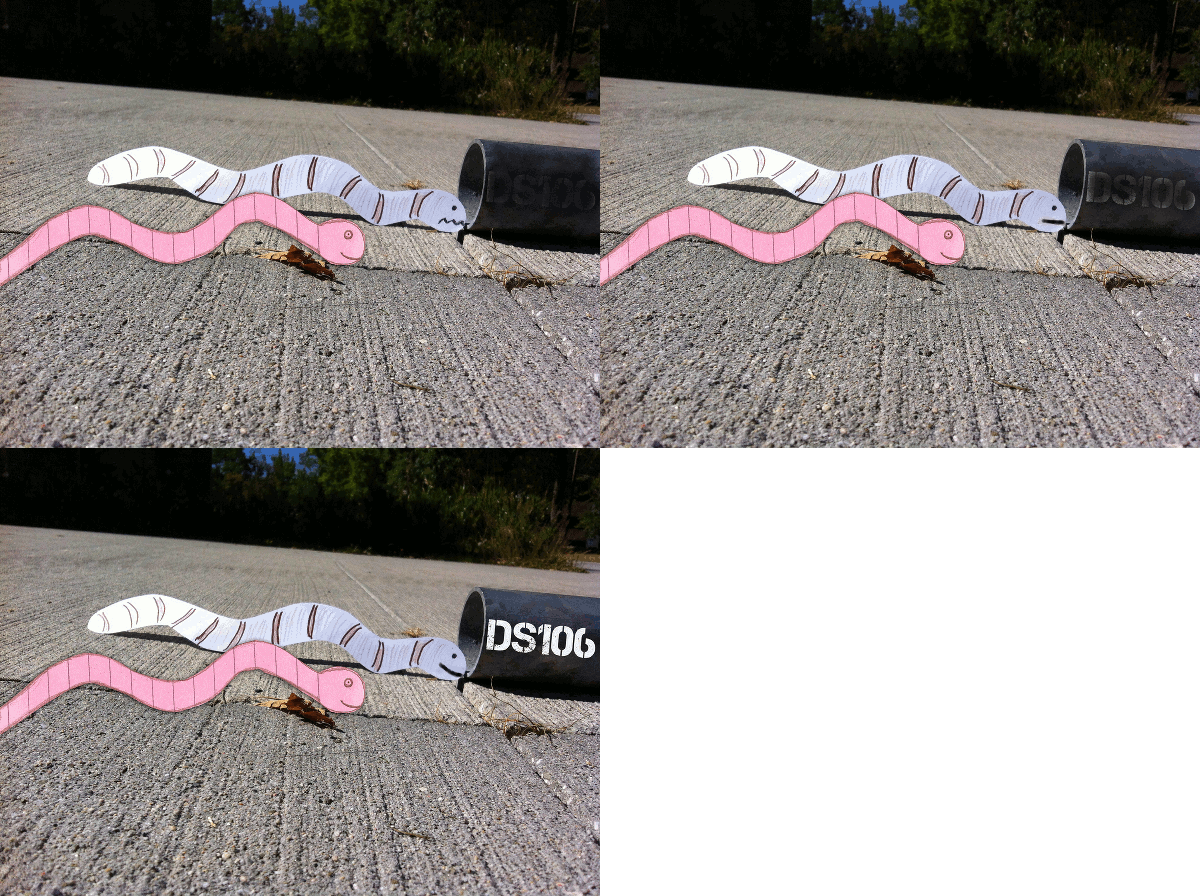
Two paper worms; one is going into a pipe with DS106 on it. One worm's frown turns to a smile in this animated gif.

Turn that frown upside down!

This one has a bit of a story behind it.

First, there was a ds106 daily create that asked us to make a photo from the perspective of an earthworm. Here’s mine.

Then there was a ds106 daily create that asked us to make a photo story with a paper cutout in it. Rockylou made this one, which inspired me to make a worm one too, relating it back to my “perspective of an earthworm” shot.

All fine and good, except then Mariana Funes suggests we make the worms mascots for the Headless ds106 course in the Fall.

So of course we play along. Rockylou pulls her worm out of the trash and puts our two worms together in a photo. Nice! Except mine shouldn’t have an unhappy face when going into ds106.

So I decided that the more it became clear to my worm that where it was headed was ds106, the happier it became!