Bird Call for Martin Sloan

This assignment for ds106 asks for a “bird call” one might use to attract a particular character (such as someone from a film, tv episode, book, or other narrative). I made one for Martin Sloan, the lead character in the Twilight Zone episode entitled “Walking Distance.” 

I cheated a bit, b/c it’s only supposed to be 30 seconds long, but it’s nearly 1 minute. That’s b/c I added a bit onto the end that wouldn’t attract Sloan, but does indicate that “you can’t go back” (see below).

I chose this project because I wanted to practice getting sound effects, knowing that I’d be working on a radio play for ds106 (which I did, and it is just now finished…more on that later!). This was a great way to get to know the freesound.org site and learn to put sounds together to tell a story without any words.

The “Walking Distance” episode

(WARNING: Plot spoilers ahead! If you don’t want to see what happens in this episode, don’t read on!)

Martin Sloan is a 36-year-old ad exec (according to the Wikipedia site linked above…I can’t remember exactly what he said in the episode his profession/title is) who ends up walking from a service station to his hometown one afternoon while waiting for his car to be repaired. (It’s “walking distance” from the station.)

When he gets to the town (“Homewood”) he discovers that he has gone back in time to when he was a boy, 11 years old (if I remember his age correctly). He meets and talks with his boyhood self and with his parents. He is especially attracted by the good memories of summer as a boy in his hometown, as a contrast to his current hectic life in New York City.

In a pivotal scene, his boyhood self is riding on a carousel, eating popcorn, and Sloan is chasing after him, trying to tell him to enjoy that time of his life, because it is the best time. The young Sloan falls off the carousel and gets his leg caught in the machinery underneath. Turns out he is fine, except that he’ll walk with a limp for the rest of his life—and the adult Sloan does too, later in the episode.

The bird call for Martin Sloan

I created a bird call that would attract the adult Sloan, because it includes sounds from his childhood that he wants to relive: a carousel, popcorn popping, and someone eating popcorn.

However, I gave my bird call a twist: at the end I added the sound of a carousel squeaking as it goes around, without music. To me, this is a sombre sound, and one that reminds me of the idea that you can’t really go back to the past like Sloan wanted to. You can try, but the experience will be very different. It’s not that you can’t have new and interesting experiences, of course, but if you try to relive exactly the same thing it will ring hollow somehow.

So this bird call might attract Sloan, but would also be a reminder that any carnival he attends now will be a different experience from what he remembers as a child (and yet could still be a good one).

This could also almost count as a “5 sound story,” except it’s only 4 sounds. I tried to think of and find a 5th sound that would fit, but came up empty. I started with the “bird call” assignment idea, and decided to stick with that and keep it at 4 sounds.

The process

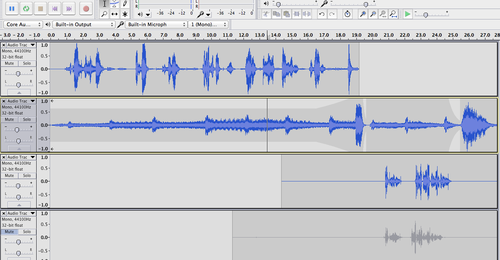
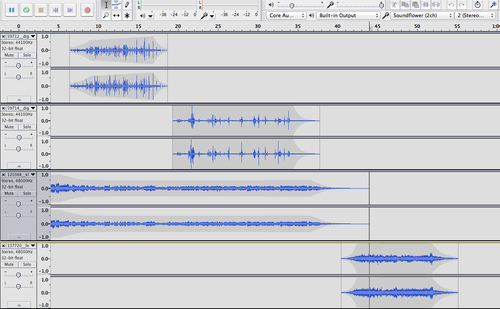
I used Audacity for this project, and four sound effects (see attributions below): a carousel with music, popcorn popping, someone eating popcorn, and the squeaking carousel without music.

I started with the carousel music to set the scene and mood, and then turned the volume down on it when the popcorn popping and eating came in. I adjusted the volume/amplification levels on those so they could be heard well, but not be too loud. I then faded both the popcorn eating and the carousel music sounds using the “envelope” tool, and brought in the carousel squeaking sound at the end.

Here’s a screenshot of the four tracks. I didn’t need four; I could have put the popcorn popping and eating on the same track, and the carousel music and carousel squeaking both on a second track. But it sounds the same, regardless!

image

Attributions

I got all the sounds for this project from www.freesound.org

Most of them were licensed CC-BY; the carousel squeaking sound was CC0, but I list it here in case anyone else wants to use it!

Eating popcorn sound came from digifish music (www.digifishmusic.com): http://www.freesound.org/people/digifishmusic/sounds/59714/

Carousel music sound came from klankbeeld: http://www.freesound.org/people/klankbeeld/sounds/120368/

Popcorn popping sound came from digifish music (www.digifishmusic.com): http://www.freesound.org/people/digifishmusic/sounds/59712/

Carousel squeaking sound came from Felix.Blume: http://freesound.org/people/felix.blume/sounds/137720/

What was that? ds106 radio bumper

I was inspired to do this bumper by this one over at raptnrent.me. I loved how audio from a Twilight Zone episode was used in that bumper, and it gave me an immediate idea for how to use some audio from the Twilight Zone episode called “The Midnight Sun.”

I remembered that there was a scene in which Norma and Mrs. Bronson are talking in the hallway and they hear a noise from upstairs—the unnamed man who comes and threatens them to get water. I thought it would be cool to have a bumper with someone saying “what was that?” and it being just ds106 radio.

The process was quite simple, actually. I found out about Soundflower from the Scottlo #ds106zone daily podcast, the #LoDown, who got it from the raptnrent.me blog linked above—this is an application that lets you record audio playing on your computer, but unfortunately for some it is only for Macs (I have a Mac, so it works for me). Following the directions here, I used Soundflower and Audacity to record audio from the episode while it was playing on my computer.

The dialogue between Norma and Mrs. Bronson didn’t have any music behind it, which turned out to be a good thing because I wanted to cut some of that dialogue (and if there were music it would have skipped weirdly). I was able to easily cut some of the dialogue because there were just silent spaces between (or heavy breathing from Norma, from the heat). I  wanted it to start with Mrs. Bronson saying she hadn’t heard a thing, but then go straight into “what was that?” afterwards. I skipped a few other parts of the dialogue as well.

BUT, I wanted there to be music throughout the bumper, so I recorded a section of the episode that had mostly just music. It was some part in the middle where Norma is just in her apartment and there is that oppressive “sun” music. At one point she goes to her window and burns her hand on the ledge beneath it. That’s when she does the quick suck-in of her breath you hear right before I start talking in the bumper.

So what I did was just start the music I had recorded as a separate track beneath the dialogue, and used the “time shift” tool to move it so that Norma’s breath-suck came right after the door slam at the end of the dialogue. The music seemed to work well when time shifting it that way…it built up very nicely as the audio was going along.

Then came the somewhat (but not very) tricky part. After Normal sucks in her breath, I wanted to do the bit where I talk, and I wanted music with that too. So I recorded some of the soundtrack to the episode from here into Audacity using Soundflower, onto a separate track. I wanted some background music as well as something that would be good to end the bumper with, so I chose a couple of sections from what I had recorded and cut and pasted the two different parts together.

But of course, if you just put sections of music together that don’t belong together, they sound weird. So here’s what I did. I added some silence (by cutting and pasting from a silent part of one of the recordings) right after the breath-suck-in, and then started the first piece of music over which I would speak. The nature of the music worked with just silence before it. I then  used the “envelope tool” to fade that first piece of music down and transition to the last piece, the chord that ends the bumper.

Here’s a screenshot of what I’m talking about, with the top level being the dialogue between Norma and Mrs. Bronson, the middle being the music, and the bottom being my voiceover. You can see the “envelope” I created in the music.

image

The fourth level is an earlier version of my voiceover. I did several takes, and kept all the versions just in case.

I should also say that when I first began I used “duplicate” on the dialogue and music tracks, to make sure that when I started cutting and pasting, I’d still have the original version of each track in case I didn’t like what I had done. Yes, you can use “undo” to go back to earlier versions, but if you’ve done a lot you have to go back a lot. And this way it’s easy to just start from scratch.

So this Audacity file has a lot of tracks right now—the original dialogue/the edited dialogue; the original music that goes before my voiceover/the edited music before my voiceover; the original music I cut from to go during my voiceover/the edited version of music during my voiceover, plus all the takes of the voiceover!

This was really, really fun to do, and only took me about 3-4 hours total, over two nights. Looking forward to doing more audio assignments!

P.S. I used to do this sort of thing a lot when I worked in college radio as an undergrad, but (and this is dating me) we used (gasp!) physical tape. We had to cut and splice tape with scissors and, well, sticky tape. All my work from that time is sitting on a reel to reel tape in a box somewhere in my house, or recorded onto a cassette in some other box in my house. This way is MUCH easier.

Better Twilight Zone Invaders gif

Creepy little spaceman is even creepier now.

Here is what I managed to do to fix the jumping image in the first animated gif I ever created (see previous post). The part of the image with the dress was moving around a lot, but the spaceman’s movements looked pretty good. I asked for help with this on my previous post, and voilà, I got it! Andrew Forgave suggested using a mask to keep the dress part still and the spaceman be the only part that’s moving.

I’m using gimp to make these gifs, so I watched some gimp tutorials on layers and masks just to get my head around them. I found this one pretty helpful and straightforward, and I also watched this one, which didn’t quite get me what I was looking for, but gave me some ideas on just what the heck a mask is and how to make one by painting.

Neither of these told me how to do what I needed to do, though: create masks that will apply throughout all the layers in an animated gif, so that one part of the image remains still and the other part goes through all the layers as an animation.

I tried my best to figure out how do that on my own, but didn’t get very far. Basically I was making the part I wanted to animate transparent, which made sense to me b/c I thought I’d want those animation layers to come through. But it wasn’t working; the dress part was still animating too.

Then followed a frustrating web search for things like “gimp animated gif layer mask,” or some such, and I was just about to give up when I found…I should have known…a tutorial by Jim Groom on exactly what I’m trying to do.

That tutorial shows a simple, though somewhat work-intensive (repeating easy steps over and over) way to animate just part of a gif. And after several tries of getting the selection right, I got something I’m pretty happy with. It’s not perfect, as I could still use to tweak the selection a bit so that less of the stuff around the knife animates, but I’m quite happy at this point.

The process

What I did was use the “free select,” or “lasso” tool to select a section around the spaceman: I selected the black rectangular area that he is in, and had to go around the knife. I wish I had screenshots to show you, but I didn’t take any during the process, and then after I had applied the layer mask to each layer you can’t see the earlier steps!

Then, I created a layer mask: go to Layer->Mask->Add layer mask, and choose “selection.” I can’t remember whether it will make the selection black or white, but what you want is for it to be white, because that means that that part is visible. Black turns that part of the image transparent. Transparency in gimp looks like a strange checkerboard. So if when you do the selection and make a layer mask to selection the selection is black, what you have to do is go to Select->Invert and then add a new layer mask to the “inverted” selection and it should be the right colour.

Here, in a screenshot of the final product layers, you can see that everything but the spaceman is transparent in the gif.

What this does is allow the bottom layer to show through as is—that’s the “still” part. Then the part that isn’t checkerboarded is the part that is visible on each layer, and as GIMP moves through the layers when it animates, those parts of each layer are visible and you get the movement.

But, as noted in Groom’s tutorial (linked above), you have not not only create a layer mask for each layer, you also have to “apply” it. You can do that by going to Layer->Mask->Apply layer mask. Or there’s a shortcut for layer actions: click on the layer in the layer list (in the image above, I’ve clicked on the first one, so it’s got a white border), and then do “Control-click” on it (on a Mac, anyway; same for PC?). That will give you a list of commands to choose from—you can add layer mask, apply layer mask, change layer attributes (including giving it a new name), and more.

With this gif, I was able to use the same selection for adding layer masks to each layer, because the knife didn’t move very much. What you do is just don’t unselect anything, but keep the selection as is and add layer masks to each layer. But I did have to make sure the selection went far enough around the knife that when it’s in a different position on each layer, the selection still covers it so it doesn’t move into the transparent area.

Another option, of course, is to make a new selection for each layer, but who wants to do that unless you have to? (Added later: I did have to do that for a different gif, and it took a long time!).

And now it’s time for bed here in Australia. With a sense of accomplishment!

[Added later] And in true ds106 fashion, this gif was added to by Vivien Rolfe, to make something even better! See (and hear) here!

Twilight Zone: Invaders gifs

Creepy little spaceman with paring knife is creepy.


This potato sure is tough…


The top one is my first gif ever. They’re both from the Twilight Zone episode posted for #ds106, here, called “The Invaders.” I could only download part of it, so I didn’t have as much material to work with in making a gif as I would have liked. I’m going to try to make one or two from another episode I find elsewhere on the net.

Both of them jump a lot, which means I need to work on the timing, or picking a different scene.

I don’t have much of a story behind these, except I was trying to find scenes that would make smooth gifs!

In the first one I was focusing on the spaceman’s knife and I think I got the movement from that down pretty well…it looks okay, but the woman’s movement is jerky. I wish I could just mask her out or something to make the alien knife look better. Any suggestions on how to do that sort of thing?

In the second one, I thought it would be cool if she could just chew forever, and have an endless amount of potatoes going into the pot. I like how the candle in the background actually looks like it’s just flickering! I think of the two, I like this second one best for smoothness…but I like the first one best for creepiness and I wish I could do something about the jumping woman to the left of the spaceman.

One more question: I’d like to be able to show the captions for images in the posts, rather than only when you click on the images (as it is now). Any idea how to do that?

These were done for the #ds106 animated gif assignment on Twilight Zone

I used MPEG Streamclip and then GIMP, as described here.